How To Test Mic On Chromebook?
Chromebooks are a versatile, low-cost computing option that many people are using as their primary computer.
The best thing about Chromebooks is that they come with built-in mics that are perfect for making video calls or recording video.
If you're new to Chromebooks or just want to make sure your mic is working correctly, here's how to test it.

Test Your Microphone With Audio Settings
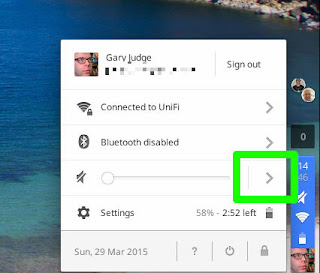
Open up the audio settings by clicking on the speaker icon in the bottom-right corner of your screen. Then, click on “Microphone” and make sure that it is set to the correct input device.If not, you can change it by clicking on the dropdown menu which should appear next to your microphone's name. After that, test your microphone by speaking directly into it. If you are using airpods then speak into the airpods mic and see if you can hear the voice clearly or not.
Use An App To Test Your Microphone
If your microphone still isn't working correctly, you can use apps such as Google's Voice Recorder or QuickTime to test it out. To do this, simply launch the app of your choice and press “Record”.After a few seconds, you should hear yourself speaking through the microphone if it is working properly. If not, check to make sure that all of the settings are correct and if they are, you may need to update your drivers once more. Alternatively, You can perform an online mic test by using online websites.
Look for privacy settings:
Some Chromebooks come with a privacy settings panel that allows you to toggle the microphone on or off.Make sure that your headset microphone or built in mic is enabled before testing it out. To access this panel, open up the launcher and type in “Privacy Settings”. This should bring up a window that will show you all of the available options for controlling
Update Your microphone drivers
Before you can test your microphone on your Chromebook, it's important to make sure that all of the necessary drivers are up-to-date.To do this, open up your launcher and type in “Device Settings”. Click on the icon which should appear after typing that command in.
Once inside the Device Settings menu, choose “Audio Output” and make sure that the correct driver is installed. If it isn't, click on “Update Drivers” and follow the prompts to install them.
What if I hear a static sound?
If you hear a static or buzzing sound when trying to test your microphone, it could indicate that there is an issue with the audio drivers.Make sure that they are all up-to-date and if not, go back to step 1 and follow the instructions again. If this doesn't help, you may need to contact Chromebook customer support for further assistance.
Just follow the above steps and you'll be able to test your microphone on your Chromebook quickly and easily. If your mic still isn't working, don't give up – contact the customer support of your Chromebook for further help.
Just follow the above steps and you'll be able to test your microphone on your Chromebook quickly and easily. If your mic still isn't working, don't give up – contact the customer support of your Chromebook for further help.
Comments
Post a Comment